Tuesday, 11 August 2020

Selenium Webdriver Example to Launch Chrome Driver with TestNG with Maven Tutorial

 In this article, you will find set up a Selenium Webdriver maven project in Eclipse.


 you must assure whether you’ve Maven integration for Eclipse enabled. You can check it by opening the Eclipse marketplace searching for the maven. If it’s not added click to install maven.

in the previous article, we discuss what is testNG and selenium.


Prerequisites

Java 

Eclipse 

TestNG


how to Install TestNG?


TestNG report

 directly from the Eclipse Marketplace.

You can add this plugin from the Eclipse Marketplace.


Step 1: Click on the "Eclipse Marketplace"  under "Help" option in the main toolbar

Step 2: After loading marketplace In the "Find" input field type"TestNG" and hit enter.

Step 3: you’ll find an "Install" button then continue installing the TestNG.

then you need  Selenium dependencies to run project. This is why you need to build automation tools such as Maven to handle them automatically.because manually handling dependencies can be pretty challenging.


Why We Use Maven?

simply you’ll only need to specify the dependencies in the pom.xml file.


pom.xml ( Project Object Model )

POM XML contains project information and configuration details used by Maven build. It is located in the root directory of each project.


What is Dependency 

Any kind of Library which a java project is reliant on, to run or build.


To start the maven project you need to follow below steps.


 Step 1: Press "Ctrl + N" to create a new project from the Eclipse IDE.

 Step 2: Then hit on Maven > Maven Project and click on Next

Step 3: Tick the "Create a Simple Project (skip archetype selection)" checkbox and click                 Next.

Step 4:  Now you’ll need to type information on the Maven project is created.

                Group Id- corresponds to your name or org name

                Artefact Id- refers to the project name.

                Then hit on the finish button


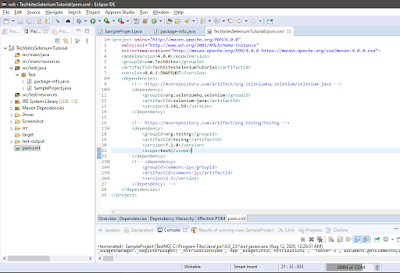
Step 5:  You can now open the pom.xml to view the structure set up by Maven.


Generated project Java code is placed in /src/main/java.

Resources are kept in /src/main/resources

Testing code is placed in /src/test/java

Testing resources are placed in /src/test/resources


you can find dependencies on the maven repository make sure to paste dependency inside <dependencies>    </dependencies>


eg:
<dependencies>
<!-- https://mvnrepository.com/artifact/org.seleniumhq.selenium/selenium-java -->
<dependency>
<groupId>org.seleniumhq.selenium</groupId>
<artifactId>selenium-java</artifactId>
<version>3.141.59</version>
</dependency>

<!-- https://mvnrepository.com/artifact/org.testng/testng -->
<dependency>
<groupId>org.testng</groupId>
<artifactId>testng</artifactId>
<version>7.1.0</version>
<scope>test</scope>
</dependency>
</dependencies>


then press "Ctrl+S" it will automatically download all mentioned dependencies make sure to connect to the internet during this time period if your first time on those kinds of dependencies it will take pretty much time.

Now you can create a new package on /src/test/java and create a class 

to start work with browser you need to set up one more thing its called Web driver in this post I work with Chrome driver but there are many web drivers available like firefox driver safari ext,

to place the driver you need to create a folder inside the project directory in my scenario I create a folder called Driver inside my project 


before download driver, you need to check your browser version if your browser version and driver not matched your execution will not be successful 


To check your browser version 


Click on 3dot icon then "Help" > "About Google Chrome" then you will find the version of your browser.

after that, you need to download chrome driver using this link according to your browser version.
when downloading unzip driver and placed it under the folder you created.

now on you can start scripting.
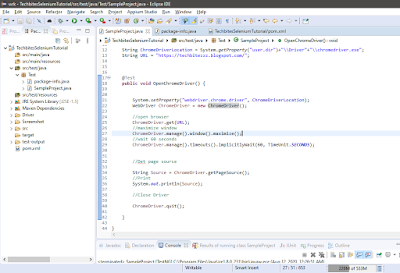
the first step is initiating webdriver to work on. we can use "setProperty" method it fetches the current properties that JVM on your System gets from your OS
It indicates that it sets the system property 'propertyName' to have the value

then we need to create a driver object. after that, you can start open chrome browser

in this code, I'm not going to talk about object locators in here mainly focus on how to start web driver.
anyone can download this project on Github

in this tutorial, I'm not going to use TestNG annotation because there is only one method.

in here "getPageSource" command used for getting page sourcecode. in the next tutorial, I'm going to work with Xpath and more selenium commands.

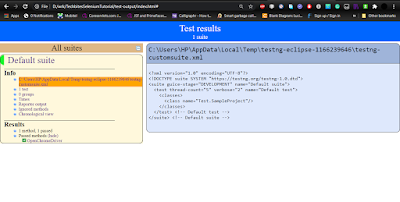
after the execution of the test cases test ng generates the report for us it's in the "test-output" folder in the root directory 

I'll upload the project on Github: URL Click Here


package Test;

import org.openqa.selenium.WebDriver;
import org.openqa.selenium.chrome.ChromeDriver;
import org.testng.annotations.Test;
import java.util.concurrent.TimeUnit;


public class SampleProject {

	
	String ChromeDriverLocation = System.getProperty("user.dir")+"\\Driver"+"\\chromedriver.exe";
	String URL = "https://techbitezzz.blogspot.com/";


	@Test
	public void OpenChromeDriver() {


		System.setProperty("webdriver.chrome.driver", ChromeDriverLocation);
		WebDriver ChromeDriver = new ChromeDriver();

		//open browser
		ChromeDriver.get(URL);
		//maximize window
		ChromeDriver.manage().window().maximize();
		//wait 60 seconds
		ChromeDriver.manage().timeouts().implicitlyWait(60, TimeUnit.SECONDS);

		
		//Det page source

		String Source = ChromeDriver.getPageSource();
		//Print
		System.out.println(Source);
		
		//Close Driver

		ChromeDriver.quit();		
		
	}
	
}


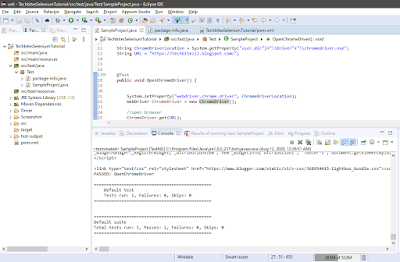
console output of testNG and selenium execution


No comments:

aaaaa

+94770320006 Bank Code Branch Code 7135 249 this is usd account only you can trancefer USD